AI Rainy to Sunny Photo Converter
Our AI Rainy to Sunny tool turns wet, gloomy exterior listing photos into clear, sunlit property images without changing the building, landscaping, or objects in frame. Upload a rainy exterior, and we clear the heavy grey sky, puddles, standing water, rain streaks, and visible droplets while taking the dark, water-soaked look off paving, roofing, and facade surfaces. We then re-light the scene with warm directional sunlight and consistent shadows, giving you a brighter, drier version of the same property ready for marketing.
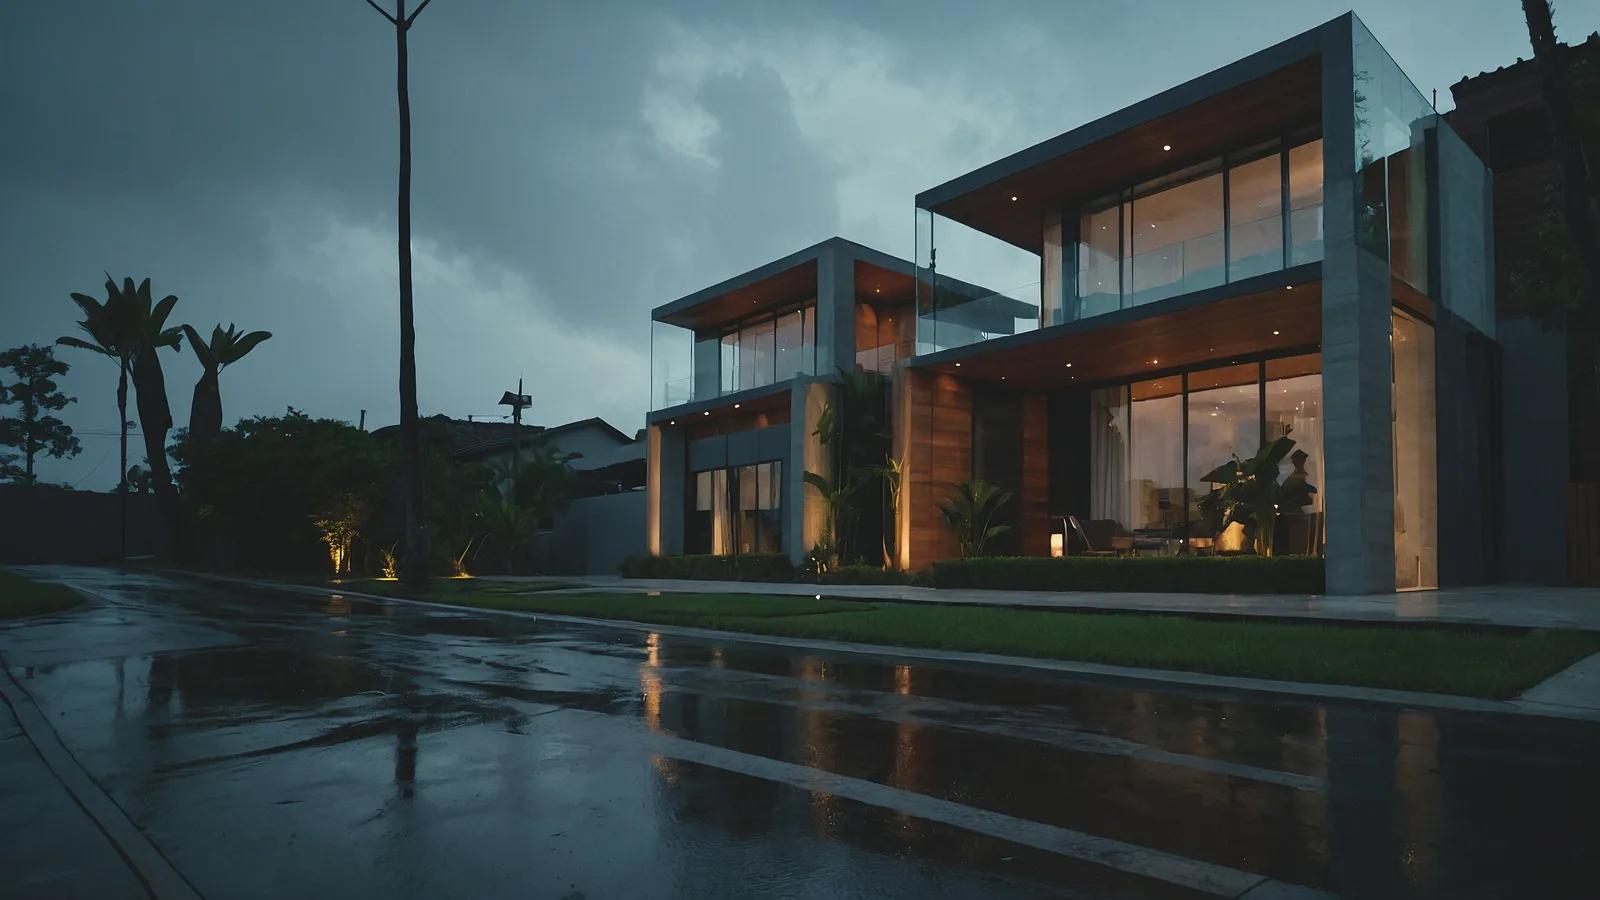
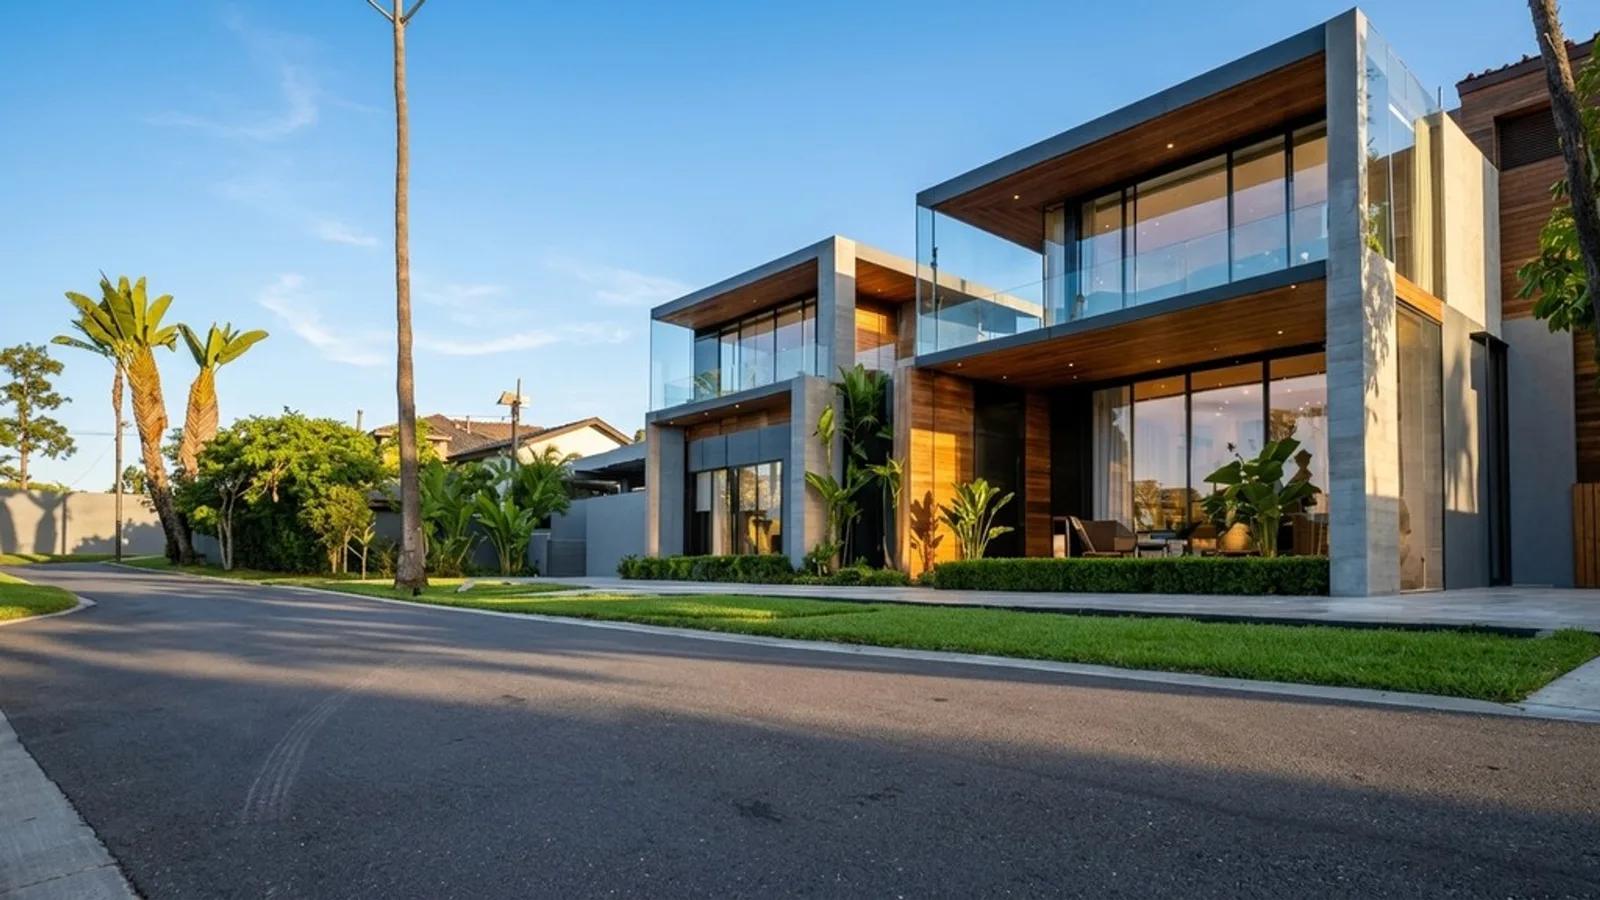
What Is AI Rainy to Sunny Photo Editing?
AI Rainy to Sunny editing is a real estate photo weather-conversion process for exterior images captured in wet conditions. Instead of simply replacing a grey sky, we address the visible signs of rain across the whole frame: standing water, driveway puddles, rain streaks, droplets on the lens or windows, and the dark saturated appearance wet materials can create. We then rebuild affected surfaces and balance the scene with sunny-day light so the result reads as one coherent exterior photograph.
The goal is presentation, not property alteration. Your building, driveway layout, landscaping, roofline, windows, fences, and other fixed elements stay recognizable. Only the weather, visible wetness, and lighting treatment change, helping agents and photographers rescue an exterior set when the available shoot window lands on a rainy day.
How to Turn a Rainy Property Photo Sunny
Converting a wet exterior takes three simple steps and no manual retouching:
- 1Upload your rainy exterior — Add the property photo with the wet paving, puddles, rain, or grey sky you want cleaned up.
- 2Convert the weather — We remove visible rain and standing water, rebuild affected surfaces, replace the sky, and re-light the scene for a sunny-day look.
- 3Review and download — Compare the result with the original, check property details and reconstructed areas, then download the edited image.
A convincing weather edit depends on consistency across the whole photograph. Dry paving should match nearby surfaces, window and lens droplets should clear naturally, and new sunlight should agree with the shadow direction. We treat these elements together so the final image feels like the same property photographed in better weather, not a blue sky pasted over a rainy scene.
Why a Dry, Bright Exterior Reads Better
Rain can flatten an exterior listing photo and pull attention toward the weather instead of the property. A carefully converted sunny version helps the facade, grounds, access areas, and outdoor features read more clearly in marketing. Here’s why agents, photographers, and property managers use Rainy to Sunny when a reshoot is not practical:
- Clearer exterior presentation — Removing rain and heavy grey weather lets buyers focus on the building, frontage, and landscaping.
- Cleaner driveways and paths — Puddles and standing water no longer dominate paving, roads, or access areas in the frame.
- More readable materials — Dry-looking render, roofing, concrete, brick, and paving show their tone and texture more clearly than when they are darkened by rain.
- One coherent sunny-day look — Sky, light, surface wetness, and shadows are treated together rather than as disconnected edits.
- A practical alternative to a weather reshoot — Rework an otherwise usable exterior set when the only shoot window happened to be wet.
What We Change in a Rainy Exterior
Rainy to Sunny focuses on weather-related distractions while preserving the photographed property and its fixed features:
- Sky and ambient light — Replace the heavy grey sky and shift the scene toward a clear, brighter daylight presentation.
- Puddles and standing water — Remove visible pools across driveways, paths, roads, and other hard surfaces, then reconstruct the area underneath.
- Rain streaks and droplets — Clear visible rain marks and droplets from the lens and windows where the source gives enough detail to work with.
- Wet surface appearance — Reduce the dark, saturated look rain creates on paving, facade render, roofing, and similar exterior materials.
Rainy to Sunny, Cloudy to Sunny, and Add Clouds to the Sky
These weather-editing tools are related, but each solves a different exterior-photo problem:
- Rainy to Sunny is for genuinely wet scenes — we address puddles, standing water, droplets, rain streaks, the grey sky, and the overall rainy light.
- Cloudy to Sunny is for dry but overcast photos — it replaces the flat grey sky and re-lights the scene without the extra wet-surface cleanup.
- Add Clouds to the Sky is for an existing clear or empty sky — it adds natural cloud detail while keeping the current time of day and scene lighting.
Use Rainy to Sunny when the photograph visibly shows wet weather. If the exterior is dry and simply overcast, Cloudy to Sunny is the closer fit. If the lighting already works and the sky only needs more depth, use Add Clouds to the Sky instead.
Inputs & Outputs
Keep Weather Edits Honest
- Rainy to Sunny is a marketing-photo enhancement, not a way to conceal the true condition of a property. We change the weather presentation while keeping the building, landscaping, access areas, and fixed objects recognizable. Very heavy rain can obscure real detail, and reflections inside large areas of standing water are reconstructed rather than revealed from hidden pixels. Always compare the result with the source, check edges, surfaces, windows, signage, and permanent features, and make sure the final listing image still represents the property honestly before you publish it.
Frequently Asked Questions
What does an AI Rainy to Sunny photo converter change?
It changes the visible weather conditions in an exterior property photo. We replace the rainy sky, remove standing water, puddles, rain streaks, and visible droplets, reduce the dark wet look on exterior surfaces, and re-light the scene for a clearer sunny-day presentation.
Does Rainy to Sunny remove puddles and standing water?
Yes. We remove visible standing water from driveways, paths, roads, and similar hard surfaces, then reconstruct the area underneath so it matches the surrounding surface. Large reflections are reconstructed, so you should review those areas closely before publishing.
Can it remove rain droplets from windows or the camera lens?
It can clear rain streaks and visible droplets from the lens and windows as part of the same edit. Results depend on how much usable property detail remains behind the water, so heavily obscured areas may need closer review.
What is the difference between Rainy to Sunny and Cloudy to Sunny?
Rainy to Sunny is designed for wet-weather photos and includes puddle, standing-water, rain-streak, droplet, wet-surface, sky, and lighting cleanup. Cloudy to Sunny is the better fit when the scene is dry but the sky and light are simply overcast.
Does Rainy to Sunny change the property itself?
No. The edit is intended to change the weather, wetness, and lighting rather than redesign the property. The building, landscaping, driveway layout, and fixed objects should remain recognizable in the final image.
Can Rainy to Sunny recover detail hidden by very heavy rain?
Only to a point. If rain, spray, fogging, or standing-water reflections hide important parts of the property, the source photo may not contain enough visible information to recover them accurately. Review reconstructed areas and use another source image when exact detail matters.
Related Tools
Cloudy to Sunny
Our AI Cloudy to Sunny tool turns a flat, overcast exterior property photo into a brighter sunny-day image without changing the property itself. Upload a listing photo with a grey or white sky and dull, diffuse light, and we replace the overcast sky with a clear blue one, re-light the scene from a single sun direction, add consistent shadows, and restore the contrast that cloudy weather can flatten. The building, landscaping, driveway, rooflines, windows, fences, and other property features stay where they were. You get a cleaner, more inviting exterior image without waiting for better weather or organising another shoot.
Boost Curb Appeal
Improve exterior presentation for property photos with an AI cleanup pass.
More resources
Read related guides in the Enhancia Knowledge Base, or see full pricing details on the pricing page.