AI Add Clouds to the Sky for Real Estate Photos
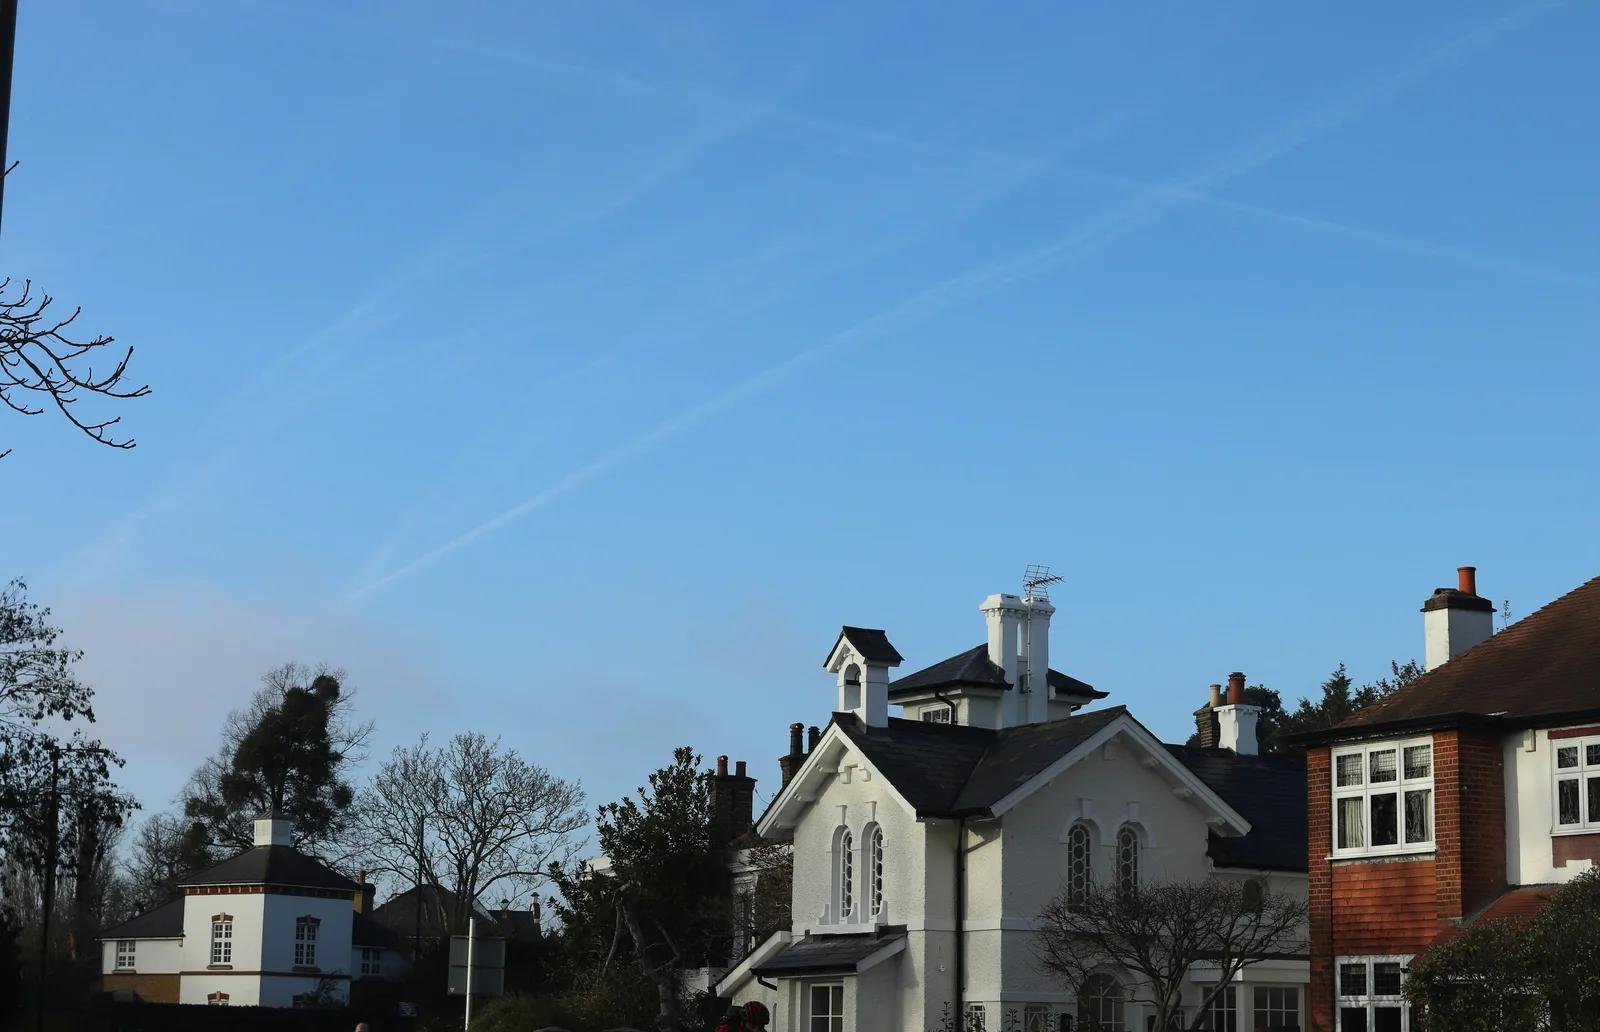
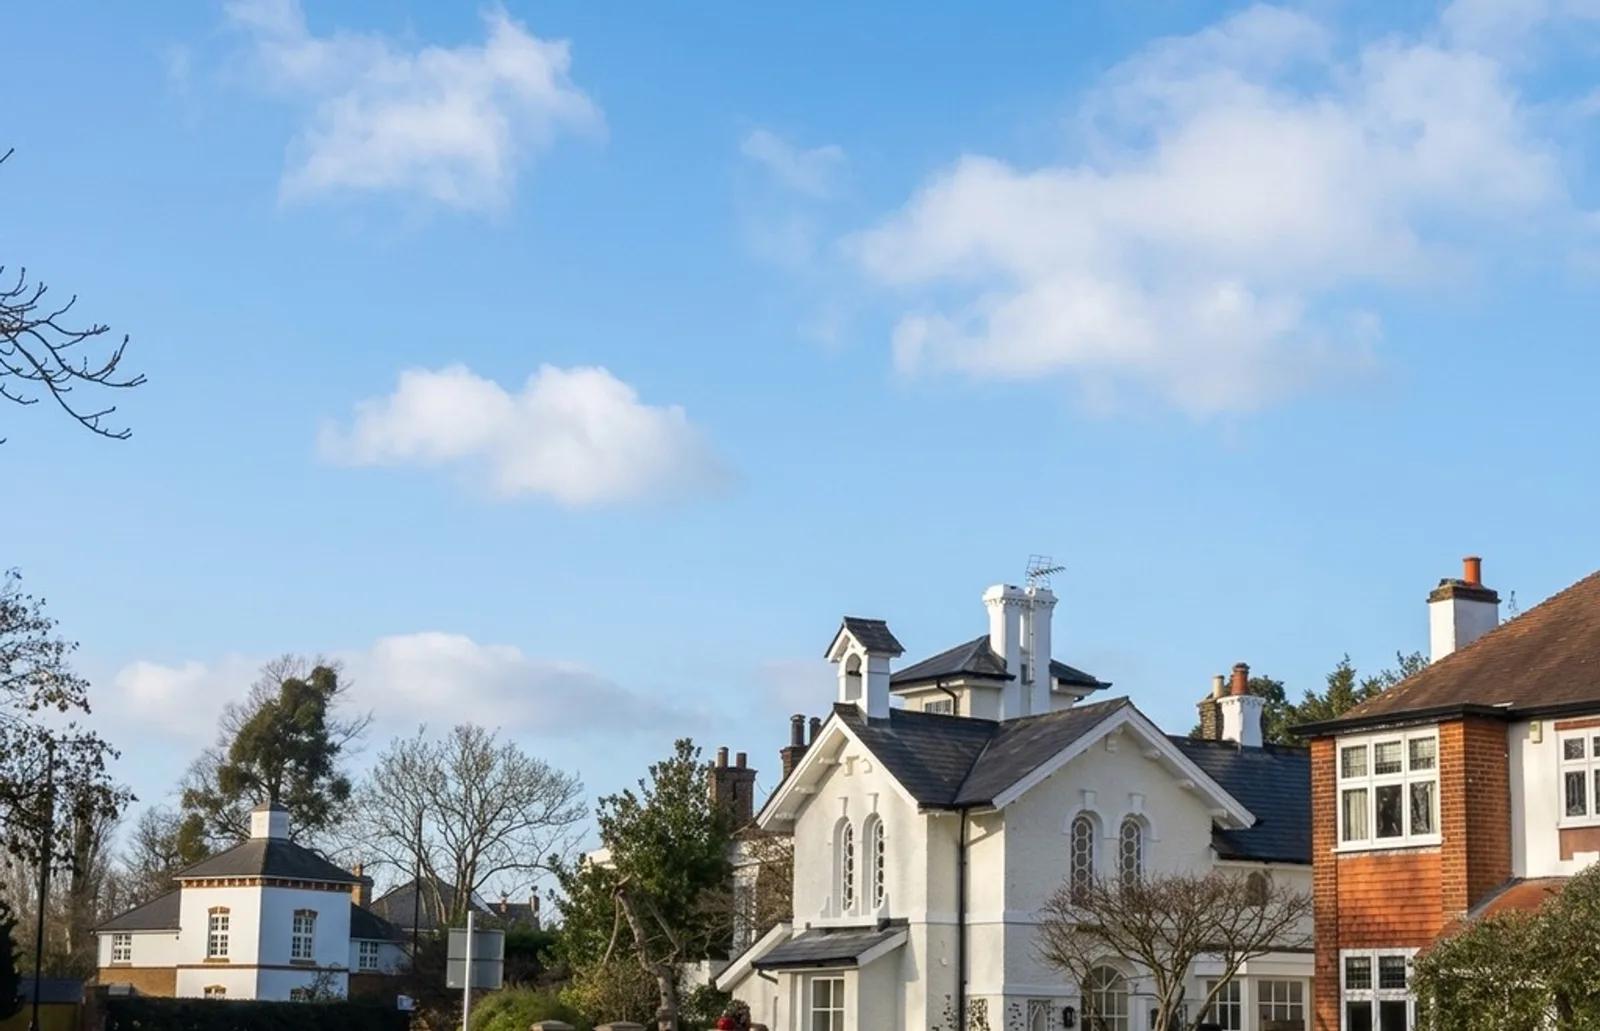
Our AI Add Clouds to the Sky tool gives blank, featureless skies natural cloud detail without replacing the whole sky or changing the property below it. Upload an exterior listing photo with a flat clear sky, and we add soft, realistic clouds with believable scale and perspective towards the horizon. We keep the existing sky colour and time of day, match the cloud lighting to the sun direction already suggested by the scene, and preserve rooflines, branches, aerials, landscaping, and the building itself. The result is a more balanced, listing-ready exterior image without manual masking or compositing.
What Is AI Cloud Enhancement for Property Photos?
AI cloud enhancement is a targeted real estate photo editing process that adds realistic cloud detail to an existing clear sky while preserving its original colour and time-of-day feel. Instead of swapping the whole sky, we work only with the empty upper part of the image, adding cloud shapes that follow believable scale and perspective as they approach the horizon. The edit is designed to sit naturally around roof edges, tree branches, antennas, and other fine silhouettes rather than looking pasted on.
A completely empty blue sky can be accurate and still make an exterior photo feel visually flat. Natural cloud texture adds depth, breaks up unused space at the top of the frame, and can help a hero image feel more finished without distracting from the home. For agents, photographers, and property marketers, the aim is simple: improve the sky’s presentation while keeping the property itself as the focus.
How to Add Clouds to a Property Photo
Adding natural cloud detail takes three simple steps and no manual photo editing:
- 1Upload your exterior photo - Add a property image with a clear or mostly featureless sky.
- 2Apply Add Clouds to the Sky - We introduce realistic cloud detail while keeping the existing sky colour, scene lighting, and time of day.
- 3Review and download - Check the horizon, rooflines, branches, aerials, and cloud integration, then save the finished image.
The edge work matters as much as the clouds themselves. We match the new cloud detail to the light already present in the photo and keep the edit above the horizon, but you should still compare the result with the original before publishing. Fine silhouettes such as tree branches, roof antennas, chimneys, and rooflines are the places where a sky edit is easiest to judge, so they deserve a careful final review.
Why Natural Cloud Detail Makes an Exterior Photo Feel Finished
A blank sky can leave a strong exterior photo feeling top-heavy, empty, or unfinished. Adding subtle cloud detail can improve the composition without converting the scene to a different time of day, relighting the property, or altering the building itself. Here’s where the edit adds the most value:
- More depth in the sky - Soft cloud detail gives a flat blue area texture and visual distance.
- Better composition - Cloud shapes break up empty space and help balance the property within the frame.
- A stronger hero image - Exterior listing photos can feel more polished for portals, brochures, and marketing campaigns.
- Existing light stays believable - We match cloud illumination to the sun direction already suggested by the building and shadows.
- Less manual compositing - Add natural sky detail without masking around rooflines and trees by hand.
What We Improve in the Sky - and What We Leave Alone
Add Clouds to the Sky is intentionally narrow. We enhance the empty sky area while keeping the photographed property and ground scene unchanged:
- Cloud detail - Add soft, realistic cloud forms to an otherwise blank or featureless sky.
- Scale and perspective - Keep cloud size and spacing believable as the sky recedes towards the horizon.
- Lighting consistency - Match the cloud light to the direction already implied by the sun and shadows in the photo.
- Clean property edges - Preserve rooflines, branches, aerials, chimneys, and other fine silhouettes without obvious halos.
Add Clouds, Cloudy to Sunny, and Day to Dusk
These exterior photo tools change different parts of the scene, so choosing the right one keeps your listing workflow accurate:
- Add Clouds to the Sky is the light-touch edit - we keep the existing sky and time of day, then add natural cloud detail above the horizon.
- Cloudy to Sunny is a weather-and-lighting conversion - use it when the whole scene is flat and overcast and needs a clear blue sky plus sunny relighting.
- Day to Dusk changes the atmosphere and time-of-day look - use it when you want a warm twilight-style marketing image from a daytime exterior photo.
Use Add Clouds to the Sky when the existing sky colour and overall lighting already look right but the sky itself feels empty. If the property was photographed under dull overcast light, Cloudy to Sunny is the better fit. If you want a deliberate golden-hour or twilight presentation, use Day to Dusk instead.
Inputs & Outputs
Keep the Sky Edit Natural and the Listing Accurate
- Adding clouds is a presentation edit, not a property alteration. We keep the building, landscaping, driveway, fixtures, and everything below the horizon as photographed, while adding detail only to the sky. Always compare the result with the original and make sure the final image still represents the property honestly before publishing. Use the tool for believable visual polish, and review any sky edit closely enough that the added cloud detail feels natural within the original scene.
Frequently Asked Questions
What does Add Clouds to the Sky do to a real estate photo?
It adds natural-looking cloud detail to an existing clear or featureless sky while keeping the original sky colour, time of day, property, landscaping, and ground scene intact.
Is adding clouds the same as sky replacement?
No. A full sky replacement swaps the entire sky. Add Clouds to the Sky keeps the existing sky and only introduces cloud detail, so the original colour and time-of-day feel remain in place.
Will Add Clouds to the Sky change the lighting on the property?
No. The scene is not re-lit. We match the cloud lighting to the light and sun direction already present so the new sky detail fits the existing exterior photo.
Does the tool change the building, trees, or landscaping?
No. The edit is intended to stay above the horizon. Rooflines, branches, aerials, landscaping, driveways, and the building itself should remain as photographed, although you should always review fine edges before publishing.
When should I use Add Clouds instead of Cloudy to Sunny?
Use Add Clouds when the sky is clear and the scene lighting already looks good but the upper frame feels empty. Use Cloudy to Sunny when the photo was taken under flat overcast light and needs both a new sunny sky and scene relighting.
Related Tools
Cloudy to Sunny
Our AI Cloudy to Sunny tool turns a flat, overcast exterior property photo into a brighter sunny-day image without changing the property itself. Upload a listing photo with a grey or white sky and dull, diffuse light, and we replace the overcast sky with a clear blue one, re-light the scene from a single sun direction, add consistent shadows, and restore the contrast that cloudy weather can flatten. The building, landscaping, driveway, rooflines, windows, fences, and other property features stay where they were. You get a cleaner, more inviting exterior image without waiting for better weather or organising another shoot.
AI Real Estate Photo Enhancer
Our AI real estate photo enhancer gives you targeted control over the issues that make listing photos feel unfinished. Upload a property image, choose the edit it actually needs, and we improve that specific part of the photo — from colour and white balance to perspective, sky, clutter, facade presentation, or resolution. Instead of pushing one generic filter across the whole image, we help you refine the photo in focused passes, review the result, and keep building toward a clean, listing-ready finish.
Boost Curb Appeal
Improve exterior presentation for property photos with an AI cleanup pass.
More resources
Read related guides in the Enhancia Knowledge Base, or see full pricing details on the pricing page.